Showing posts with label Oracle BPEL. Show all posts

Thursday, December 22, 2016

SOA 12c: Process Large Files Using Oracle MFT & File Adapter Chunked Read Option

SOA 12c adds a new ChunkedRead operation to the JCA File Adapter. Prior to this, users had to use a SynchRead operation and then edit the JCA file to achieve a "chunked read". In this blog, I will attempt to explain how to process a large file in chunks using the SOA File Adapter and some best practices around it. One of the major advantages of chunking large files is that it reduces the amount of data that is loaded in memory and makes efficient use of the translator resources.

"File Processing" means, reading, parsing and translating the file contents. If you just want to move/transfer a file consider using MFT for best performance, efficiency & scalability.

In this example, MFT gets a large customer records file from a remote SFTP location and sends it to SOA layer for further processing. MFT configuration is pretty straight-forward and is out of scope in this entry. For more info on Oracle MFT read here.

SOA 12c offers tight integration with Oracle MFT through the simple to use MFT adapter. If the MFT adapter is configured as a service, MFT can directly pass the file either inline or as a reference to the SOA process. If configured as a reference, it enables a SOA process to leverage MFT to transfer a file.

MFT also provides a bunch of useful file metadata info (target file name, directory, file size etc..) as part of the MFT header SOAP request.
Create a File Adapter:

Drag & drop a File adapter to the external references swimlane of our SOA composite. Follow instructions in the wizard to complete the configuration as shown below. Ensure that you choose the "Chunked Read" operation and define a chunk size - This will be the number of records in the file that will be read in each iteration. For eg., if you have 500 records with a chunk size of 100, the adapter would read the file in 5 chunks.


You will have to create an NXSD schema which can be generated with the sample flat file. The file adapter uses the NXSD to read the flat file and also convert it into XML format.

Implementing the BPEL Process:

Now, create a BPEL process using the BPEL 2.0 specification [This is the default option].
As a best practice, ensure the BPEL process is asynchronous - this will ensure that the "long running" BPEL process doesn't hog threads.

In this case, since we are receiving a file from MFT, we will choose "No Service" template to create a BPEL process with no interface. We will define this interface later with the MFT adapter.


Create MFT Adapter:

Drag and drop an MFT adapter to the "Exposed Services" swimlane of your SOA composite application, provide a name and choose "Service". Now, wire the MFT Adapter service and File Adapter reference to the BPEL process we created. Your SOA composite should look like below;


Processing large file in chunks:

In order to process the file in chunks, the BPEL process invoke that triggers the File Adapter must be placed within a while loop. During each iteration, the file adapter uses the property header values to determine where to start reading.

At a minimum, the following are the JCA adapter properties that must be set;

jca.file.FileName : Send/Receive file name. This property overrides the adapter configuration. Very handy property to set / get dynamic file names
jca.file.Directory : Send/Receive directory location. This property overrides the adapter configuration
jca.file.LineNumber : Set/Get line number from which the file adapter must start processing the native file
jca.file.ColumnNumber : Set/Get column number from which the file adapter must start processing the native file
jca.file.IsEOF : File adapter returns this property to indicate whether end-of-file has been reached or not

Apart from the above, there are 3 other properties that helps with error management & exception handling.

jca.file.IsMessageRejected : Returned by the file adapter if a message is rejected (non-conformance to the schema/not well formed)
jca.file.RejectionReason : Returned by the file adapter in conjunction with the above property. Reason for the message rejection
jca.file.NoDataFound : Returned by the file adapter if no data is found to be read

In the BPEL process "Invoke" activity, only jca.file.FileName and jca.file.Directory properies are available to choose from the properties tab. We will have to configure the other properties manually.

First, let's create a bunch of BPEL variables to hold these properties. For simplicity, just create all variables with a simple XSD string type.

Let's now configure the file adapter properties.

For input, we must first send filename, directory, line number and column number to the file adapter, so the first chunked read can happen. From the return properties (output), we will receive the new line number, column number, end-of-file properties which can be fed back to the adapter within a while loop.

Click on the "source" tab in the BPEL process and configure the following properties. Syntax shown below is for BPEL 2.0 spec, since we built the BPEL process based on BPEL 2.0.

Note: In BPEL 1.1 specification, the syntax was bpelx:inputProperties & bpelx:outputProperties.
Drag & drop an assign activity before the while loop to initialize the variables for the first time the file is read (first chunk) - since we know the first chunk of data will start at line 1 and column 1.

lineNumber -> 1
columnNumber -> 1
isEOF -> 'false'

For the while loop condition, the file adapter must be invoked until end-of-file is reached, enter the following loop condition;

Within the while loop, drag & drop another assign activity to re-assign file adapter properties.

returnIsEOF -> isEOF
returnLineNumber -> lineNumber
returnColumnNumber -> columnNumber

This will ensure that the in the next loop, file adapter would start fetching records from the previous end. For eg., If you have a file with 500 records with a chunk value of 100, returnLineNumber will have a value of 101 after the first loop is completed. This will ensure the file adapter starts reading the file from line number 101 instead of starting over.

Your BPEL process must look like this;

We now have the BPEL process that receives file reference from MFT, reads the large file in chunks.

Further processing like data shaping, transformation can be done from within the while loop.

Friday, July 29, 2016

Learner Series: Handling Dynamic Arrays in SOA 12c (BPEL 2.0)

Dynamic arrays are always tricky to handle within a BPEL process. Every now and then we encounter XML schemas that have generic name-value pair arrays that are unbounded. The challenge is assigning data to and from these dynamic arrays as there are no concrete XML target elements at runtime. Hence, the XML elements must be generated first before assigning values to them.

There are multiple ways this problem can be solved.

For one, you can choose XSLT over a simple assign. XSLT wields more granular control over how the XML elements are handled. You can instruct the XSL processor to loop over dynamic array list and assign values. This of course requires some level of XSLT skill (Although JDeveloper presents an easy XSL mapper, I prefer fiddling with the source) and in certain cases, you may have to pass some BPEL variables (properties) to XSLT in additions to the source and target variables.

Second option would be to use an XML literal (called XML fragment in BPEL 1.1) within your assign activity. Here you can pre-form the XML literal, assign it to the target and then map the values. Not so sophisticated and if you are not careful with namespaces, this could cause a lot of mapping troubles.

Thirdly, with BPEL 2.0 you can simply add an attribute to your copy action in your assign activity to achieve the same. Most simplest of all.

Since this is a learner series, let's get into some details on how to go about this;

Let's first understand the root-cause of the error;

The problem with assigning dynamic arrays within BPEL is that, for the first element in the array, since the XML element is always "available", the copy happens successfully.
However, starting with the second element, all copy rules within assign would fail due to a "selection failure" with the following error because the dynamic array XML elements are still not formed or is empty.

"Exception is thrown because the to-spec at line 140 is evaluated to be empty"
or
"Exception is thrown because the from-spec at line 160 is evaluated to be empty"

depending on whether you are trying to copy to a target or copy from a source.

Your XML schema containing dynamic array may look something like this;


Your typical assign would like the following - you will have to manually let BPEL know which element the values must be mapped - [1], [2], [3] .... [n]. Just append this to your root XML element which contains the dynamic array. In this case;


Now, starting with the second copy rule within your assign, right-click on the rule item and select "ignoreMissingFromData" or "insertMissingToData" depending on whether your dynamic array is being read or written to respectively.


This action would add a flag (attribute) to the copy rule instructing BPEL to handle the dynamic XML element - either ignore or insert.

<copy bpelx:insertMissingToData="yes">
or
<copy bpelx:ignoreMissingFromData="yes">

Happy BPELing...

Friday, November 22, 2013

Oracle SOA 11g HTTP POST Send/Receive (with example)

In this post let us see how to send and consume HTTP POST request using SOA 11g.

Sample attached with this post will send a file in base64encoded format as a HTTP POST request and the same will be consumed by another BPEL process which is exposed to consume the file in HTTP protocol.

We will use the following XML schema (XSD) to build our HTTP POST service;
Exposing a SOA 11g BPEL process as a HTTP service (POST):

Step 1: Create a SOA Project with empty composite and name it "HttpPostRestService"

Step 2: Drag and Drop a HTTP Binding adapter on the "Exposed Services" swimlane in the SOA composite (SCA)

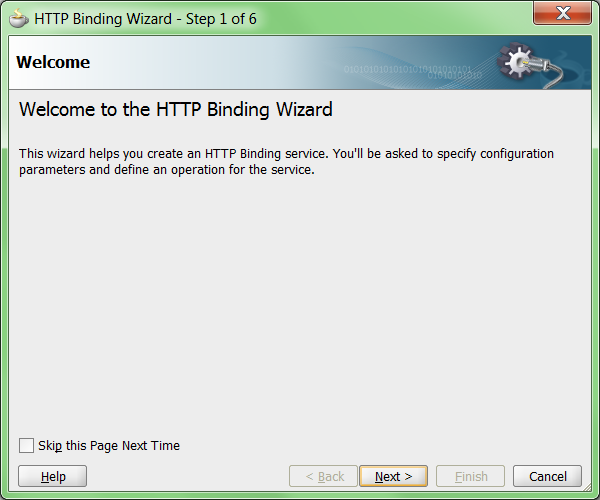
Step 3: Choose Next in the Welcome page of the wizard


Step 4: Enter service name

Step 5: Choose "Define from operation and schema (specified later)" option

Step 6: Choose the following options and click Next

Type: Service [You will choose "Reference" if you need to consume a HTTP REST service]
Operation Type: Request-Response [For 2-way communication. Choose One-way if the service doesn't return a response]
Operation Name: Defaults to Request-Response [You can change it as you please]
Verb: POST [This specifies the HTTP method. You have 2 options GET/POST]
Payload Type: XML [For HTTP POST, you get 2 options url-encoded and XML. Since our payload will be huge, url-encoded will not make sense due to size restrictions]


Step 7: In the Messages dialog, select the RestPost.xsd, <Input> and <Response> XML elements for "Request Message Schema" & "Response Message Schema" respectively.

Step 8: In the summary page, click "Finish" to complete service

Now that we have completed the HTTP binding service adapter which will expose the SOA 11g BPEL process as a HTTP service, you can choose to build a BPEL process which will consume the POST message for further processing.

Deploy the completed process and obtain the HTTP service URL from EM console. We will invoke this service from another SOA composite.

Consuming a HTTP (POST) service in SOA 11g BPEL process:

Step 1: Create a SOA Project with empty composite and name it "InvokeHttpPostService"

Step 2: Drag and Drop a HTTP Binding adapter on to the "External References" swimlane in the SOA composite (SCA)

Step 3: Choose Next in the Welcome page of the wizard


Step 4: Enter service name

Step 5: Choose "Define from operation and schema (specified later)" option

Step 6: Choose the following options and click Next

Type: Reference [Since we are consuming a HTTP service - POST]
Operation Type: Request-Response [Default selection for references]
Operation Name: Request-Response [Default]
Verb: POST [This specifies the HTTP method that will be invoked]
Payload Type: XML
Endpoint: Provide the HTTP URL for the REST service to be invoked.


Step 7: In the Messages dialog, select the RestPost.xsd, <Input> and <Response> XML elements for "Request Message Schema" & "Response Message Schema" respectively.

Step 8: In the summary screen, click Finish to complete the service adapter

Now, build and complete your SOA composite which will invoke a HTTP service using POST method.

Source code can be downloaded here

Let me know your thoughts in comments section.

Friday, October 18, 2013

Learner Series: Oracle BPEL Receive & Pick Activity With Example

This post is part of the Oracle SOA BPEL learner series.

I have been getting lots of requests to write on basic SOA BPEL use-cases from my blog readers who are starting up on SOA initiatives. One such request that often comes across is the basic difference  between the usage of a pick and receive constructs in a BPEL process.

I have created a working BPEL use-case which contains both pick & receive activities in one SOA project.

A quick introduction to BPEL Pick & Receive Constructs;

Receive Activity: This is the first activity in most of the BPEL processes. As the name indicates, this construct receives information/message from a partner link.

Pick Activity: This activity is very similar to the receive construct. But unlike the receive activity which gets triggered only when a partner link invokes it, the Pick activity has 2 choices (On Message & On Alarm) - It waits for a message from a partner link or triggers another set of activities on timeout.

Use-Case: (Hypothetical but conveys the message)

A BPEL process (ReceivePick) gets a "Customer Name" as input, calls another BPEL process (CustomerCreditScoreWS) to get the customer's credit score. The CustomerCreditScoreWS process validates if the customer name starts with "A" and returns a credit rating immediately; else the process waits for 10 seconds before returning a blank response. The ReceivePick BPEL process waits for a message (credit score) from the CustomerCreditScoreWS process. If it gets a response (On Message: credit score), the process completes by returning a "Success" message; otherwise in the event of not getting a response for 8 seconds (On Alarm: 8 seconds) the process waits and terminates by returning a "Failure".

Receive-Pick BPEL Constructs at a glance
You can download the source code for this sample here

Wednesday, April 24, 2013

JDeveloper SOA Deployment Error: Unable to find a WSDL that has a definition for service

This is one of the strange errors that I encountered recently. While trying to deploy a SOA project, JDeveloper reported the following error;


Received HTTP response from the server, response code=500
Error deploying archive sca_CreditCardProcess_rev1.0.jar to partition "default" on server soa_server1 [http://bpmsrv.example.com:8001] 
HTTP error code returned [500]
Error message from server:
There was an error deploying the composite on soa_server1: Deployment Failed: Unable to find a WSDL that has a definition for service {http://xmlns.oracle.com/bpmn/bpmnProcess/CreditCardProcess}CreditCardProcess.service and port CreditCardProcessPort.  Please make sure that the port attribute for the binding defined in the composite file is correct by checking the namespace, service name, and port name.  In addition, check that the WSDL associated with the binding namespace is imported and currently reachable (check the import nodes at the top of the composite file). Finally, validate the HTTP proxy settings for the server..

Check server log for more details.
Error deploying archive sca_CreditCardProcess_rev1.0.jar to partition "default" on server soa_server1 [http://bpmsrv.example.com:8001] 
####  Deployment incomplete.  ####

The error reported in JDeveloper is very misleading and it took me significant amount of time & effort to figure out the actual root cause. This was particularly strange in my case because the code was deployed multiple times successfully without errors in my dev environment.

Root Cause:

On closer observation into the soa server logs, I noted that a webservice reference was not "reachable" by the SOA composite and hence this error. This had nothing to do with the "exposed" service, its port or definitions whatsoever.

Fix:

In my case, the referenced webservice's hostname mapping was missing in my "new" environment because of which the SOA composite was unable to find the WSDL during deployment. It is fair for JDeveloper not to complain because it usually runs on client machine/laptop where the hostname mappings might exist. The deployment error is thrown at the server side and hence the key is to analyze the SOA server logs to figure the actual issue for a fix.

Hope this will help users with similar issues.

Tuesday, April 17, 2012

BPEL ora:countNodes() XPath function usage

Occasionally I have hit the problem where BPEL engine fails to execute the countNodes() function reporting the following error;

javax.xml.xpath.XPathExpressionException: Failed to execute countNodes() function : oracle.xml.parser.v2.XMLNodeList
        at oracle.xml.xpath.JXPathExpression.evaluate(JXPathExpression.java:242)
        at com.collaxa.cube.xml.xpath.BPELXPathUtil.evaluate(BPELXPathUtil.java:247)

Since the BPEL XPath expression builder allows declarative development, it is very tempting and easy to pick the relevant function and insert the BPEL variable from the panels for evaluation. However, for a function such as ora:countNodes(), the catch is that it doesn't expect bpws:getVariableData(blah blah blah) as an argument. Rather, the XPath expression of the variable has to be directly fed into it for proper evaluation.

Apparently, the BPEL XPath function documentation for ora:countNodes() states the following definition;

 ora:countNodes(variableName, partName?, locationPath?)

Hence,  ora:countNodes(bpws:getVariableData(variableName, partName?, locationPath?)) will eventually throw the above error. It is a very simple thing, but can easily miss the unsuspecting eyes :)

Thursday, April 12, 2012

SOA Suite 11.1.1.6 (PS5) Released !!

The Oracle SOA Suite 11.1.1.6 (PS5) is now generally available and the binaries can be downloaded from the OTN.

This release is promising and has provided better features in comparison to the previous PS4 release. Listed below are a few cool features which I found really helpful and see here for the complete list of new features available in this release.

BPEL:
  • New delivery/persistence policy for BPEL processes (aysnc.persist, async.cache & sync)
  • Similar to the 'Skip Condition's that we were used to in the BPM user assignments, skip conditions through XPath queries make way to skip activity executions in BPEL processes which can largely remove 'switch-case' design in most scenarios
  • Assertions are enabled in the request-response activities such as receive, invoke, reply etc.. where XPath conditions can be asserted to throw faults when they fail. These can be asserted before/after invocation namely pre-assert and post-assert
Human Task:
  • With regards to human-task, the much awaited feature of dynamic-assignment & task escalation can now be performed from the user task UI as provision is enabled for exposing this dialog in the user interface
Business Rules:
  • Business Rules now add capability to define rules in normal programming paradigm if-then-else, elseif, do-while, while etc.. which are greatly expected. This comes in as a great boon as earlier releases didn't offer users to define else conditions which had to be handled tactically using 'if' ONLY conditions which was a challenge in many complex scenarios
  • Usability and performance has greatly improved for editing business rules from within the composer
Business Activity Monitoring (BAM):
  • BAM is now supported on IBM Websphere
  • BAM reports based on external data objects can now be refreshed via Timer which removes the need for reload of entire report/view
  • During B2B-BAM integration scenarios we are often faced with error handling challenges at the EMS (Enterprise Messaging Service) layer which is now offered as part of this release
DB, File/FTP Adapters:
  • Optimizations for DB and File/FTP adapters such as coherence integration claims to improve the performance greatly especially during large payload interactions
Enterprise Manager (EM):
  • Alerts are displayed in the EM console for messages that are stuck in asynchronous transactions which can be recovered from within the console
  • Enhanced composite instance search provided for better search and usability for IT administrators

Sunday, October 4, 2009

Oracle BPEL Correlation Exemplified

Correlation is one of the important & tricky technique available within Oracle BPEL PM. In this blog, I have taken a simple route to explain the correlation technique.

Synchronous & Asynchronous web services:

Whenever a synchronous web service is invoked from Oracle BPEL via a partnerlink, only one port is established for communication with the exposed web service which is used by both request & response messages.
However, when an asynchronous web service is invoked, two ports are opened for communcation: one for request & one for response messages.

How does Oracle BPEL identify asynchronous responses?

As response from an asynchronous web service is not guaranteed to be received within a specified time frame, and many instances of the same service might be invoked before even a response can be obtained, how does Oracle BPEL identify and relate the responses to the appropriate requests and proceed for completion of further activities that may be scheduled? The answer is "WS-Addressing".

What is WS-Addressing?

WS-Addressing is a transport-neutral mechanism by which web services communicate addressing information. SOAP envelopes & headers used within web services for transporting data throught transport layers like HTTP does not possess intelligence to specify unique addressing information. Hence, WS-Addressing evolved which contained endpoint references (EPR) and message information headers for identification. This information is processed independently of the transport mechanism or application.
For reference on WS-Addressing click here

By default, Oracle BPEL PM implements WS-Addressing for all asynchronous web service calls, hence we don't have to explicitly implement identification relationship between the incoming & outgoing messages.

Correlation:

In short, Correlation is a BPEL technique which provides correlation of asynchronous messages based on the content of the message.

Why & Where Correlation?

The following are few scenarios in which we would be required to implement Correlation to identify & relate message communication;
1. When the external web service called doesn't have WS-Addressing capability
2. When the message travels through several services and response is solicited by the initial service from the last service directly
For instance, request flow pro1 -> pro2 -> pro3 and response is received from pro3 ->pro1

Implementing Correlation:

a.) Creating Correlation Sets:

In Structure Window of the JDeveloper IDE, right click on the Correlation Sets and choose 'Create Correlation Set'
Provide a name for your correlation set being created.
In the properties section, select 'Add' to display the property chooser window
Choose 'Create' to create a property on which the correlation has to be initiated. Provide a name and type for the property.

b.) Associating the Correlation set on receive/invoke, pick activities

Go the the correlations tab on the activity (invoke/receive/pick) on which you need to set & validate the correlation
Add the created correlation set to the activity

Initiate Attribute: (Value Set - yes, no)
When set to yes, correlation set is initiated with the values of the properties available in the message being transferred
When set to no, correlation set validates the value of the property available in the message

Pattern Attribute: (Value Set - in, out, in-out)
When the value is 'in', it means that the correlation property is set/validated on the incoming message
When the value is 'out', it means that the correlation property is set/validated on the message going out of BPEL
In case of 'in-out', the property will be set/validated on both incoming & outgoing messages

c.) Creating Propery Alias:

In the Structure Window of the JDeveloper, right click on the 'Property Aliases' and select 'Create Propery Alias'
Select the message type that you want to set to the correlation propery (already created)

Now, correlation design is complete. However, correlation will not be established unless we reference the correlations on the WSDL file of the BPEL process. To do this, import the correlation WSDL file (created under the project) in the BPEL process main WSDL.

Tuesday, September 8, 2009

BPEL Process Manager Server (10.1.3.4) Connection Failed

After upgrading to Oracle SOA 10.1.3.4 Integration Server connection cannot be established through JDeveloper. When looking into the OPMN log files the following error was logged;

java.lang.IllegalStateException: MessageDrivenHome:: application state=3 - Application: 'hw_services' is not in RUNNING state.
at com.evermind.server.ejb.MessageDrivenHome.checkRunningState(MessageDrivenHome.java:1216)
at com.evermind.server.ejb.MessageDrivenConsumer.run(MessageDrivenConsumer.java:162)
at com.evermind.util.ReleasableResourcePooledExecutor$MyWorker.run(ReleasableResourcePooledExecutor.java:298)
at java.lang.Thread.run(Thread.java:595)

To overcome this issue, login to the em console (Application Manager) [http://hostname:portname/em] and restart the hw_services available under the oc4j_soa instance. This should resolve the connection issue & a retry for establishing connection via JDeveloper will succeed.

Wednesday, May 27, 2009

Import DVM using Java-Ant

While writing an Ant build script to deploy the BPEL/ESB processes, it became absolutely important to deploy/import the DVMs automatically using Ant build scripts. While surfing thru the web, I came across a piece of Java code that will accomplish this task. I have made few enhancements to the code which will dynamically get the DVM file details from a property file for import.

Pre-Requisites:

1. You will need to import the commons-codec-1.3.jar available in the SOA suite ($SOA_Home\Integration\esb\lib)
2. Download the commons-httpclient-3.1.jar from the internet (Any older version will throw errors!)
3. Import commons-logging.jar from $SOA_Home\Integration\esb\lib folder

Functional Aspects:

a.) The following piece of code will use a property file called ImportDVM.properties which will contain the dynamic parameters such as hostname, port number, username, password and more importantly the dvm file(s) location

b.) Multiple DVM files can be imported at a time by providing a comma (,) separated list of DVM file locations for the "dvm" parameter in the properties file

Java Source Code:

import java.io.ByteArrayOutputStream;
import java.io.File;
import java.io.InputStream;
import java.util.Properties;
import java.util.StringTokenizer;
import org.apache.commons.httpclient.HttpClient;
import org.apache.commons.httpclient.methods.GetMethod;
import org.apache.commons.httpclient.methods.PostMethod;
import org.apache.commons.httpclient.methods.multipart.FilePart;
import org.apache.commons.httpclient.methods.multipart.MultipartRequestEntity;
import org.apache.commons.httpclient.methods.multipart.Part;
import org.apache.commons.httpclient.methods.multipart.StringPart;

public class ImportDVM {
public static void main(String[] args) {
Properties props = new Properties();
try {
InputStream in = Class.forName("ImportDVM").getResourceAsStream("ImportDVM.properties"); // Properties file to define your dynamic parameters
props.load(in);
String esbHost = props.getProperty("hostname");
int esbPort = Integer.parseInt(props.getProperty("port"));
String username = props.getProperty("username");
String password = props.getProperty("password");
String fileLocation = props.getProperty("dvm"); //dvm file location
StringTokenizer st = new StringTokenizer(fileLocation, ",");
while (st.hasMoreTokens()) {
String dvm = st.nextToken();
importDVM(esbHost, esbPort, username, password, dvm);
}
} catch (Exception ex) {
ex.printStackTrace();
}
}
public static void importDVM(String esbHost, int esbPort, String username, String password, String fileLocation) {
try {
InputStream is = null;
HttpClient client = new HttpClient();
int responseCode = 0;
client.getHttpConnectionManager().getParams().setConnectionTimeout(90000);

// Authenticate
String authUrl = "http://"+esbHost+":"+esbPort+"/esb/j_security_check?j_username="+username+"&j_password="+password;
GetMethod auth = new GetMethod(authUrl);
responseCode = client.executeMethod(auth);

// ImportDVM
File targetFile = new File(fileLocation);
PostMethod post = new PostMethod("http://"+esbHost+":"+esbPort+"/esb/esbConfiguration/executeCommand?action=ImportDVM");
post.setRequestHeader("User-Agent", "ESB Client/1.0");
//StringPart s1 = new StringPart("importType","map");
//StringPart s2 = new StringPart("importMode","overwrite");
//FilePart f1 = new FilePart(targetFile.getName(), targetFile);
Part[] parts = {new StringPart("importType","map"), new StringPart("importMode","overwrite"), new FilePart(targetFile.getName(), targetFile)};
System.out.println(Part.getLengthOfParts(parts));
post.setRequestEntity(new MultipartRequestEntity(parts, post.getParams()));
responseCode = client.executeMethod(post);
System.out.println("Response code: " + responseCode);
is = post.getResponseBodyAsStream();
ByteArrayOutputStream baos = new ByteArrayOutputStream();
int c;
while ((c = is.read()) != -1) {
baos.write((char)c);
}
byte[] responseBody = baos.toByteArray();
post.releaseConnection();
String response = new String(responseBody);
System.out.println(response);
} catch (Exception e) {
e.printStackTrace();
}
}
}

Executing from Ant:

So far so good. Now it turns out to be very simple. Just compile the class and call this using the "java" ANT task.
You got a class not found exception huh? Yup, you have forgotten to keep the Java class location in your classpath.

We are now good to go!

Monday, May 11, 2009

Issue with BPEL Date Functions

The Oracle BPEL date function xp20:current-dateTime() comes in very handy whenever we require to track/print the current system timestamp inside a BPEL process at runtime. However, there is a glitch with this function during the daylight savings timezone settings, as this function returns the timestamp 1 hr ahead of the actual time during the daylight savings. This issue was logged with Oracle and the issue was attributed to the JDK version (1.5.0_06) bundled with the SOA suite 10.1.3.3. To resolve this issue at hand, an upgrade to at least JDK version 1.5.0_16 is recommended.

However, to overcome this issue even more easily, you can use the Oracle BPEL XPath extension function ora:getCurrentDateTime() to get the current system timestamp exactly even during daylight saving settings. If you have the same issue, try this out and this should work as it worked fine for me ;)

Friday, May 8, 2009

Passing BPEL variables to XSL

I have always wondered, it would be great to pass runtime variable data from the BPEL process to a XSL file for processing within the transformation. To achieve this you can follow the steps as given below;

1. Create a custom schema (namely xslproperties.xsd) as given below & import this schema into your BPEL process.

<xml version="1.0" encoding="windows-1252" ?>
<xsd:schema xmlns:xsd="http://www.w3.org/2001/XMLSchema"
xmlns:p="http://schemas.oracle.com/service/bpel/common"
xmlns="http://schemas.oracle.com/service/bpel/common"
targetNamespace="http://schemas.oracle.com/service/bpel/common"
elementFormDefault="qualified">
<xsd:element name="parameters">
<xsd:complexType>
<xsd:sequence>
<xsd:element name="item" minOccurs="1" maxOccurs="unbounded">
<xsd:complexType>
<xsd:sequence>
<xsd:element name="name" type="xsd:string"/>
<xsd:element name="value" type="xsd:string"/>
</xsd:sequence>
</xsd:complexType>
</xsd:element>
</xsd:sequence>
</xsd:complexType>
</xsd:element>
</xsd:schema>

2. Create a variable (for instance, xslParameters) in your BPEL process of type xslproperties.xsd
3. Now, assign the values to this schema using a transformation activity. You can assign the variable name to the <name> element & variable value to the <value> element
4. If you have to pass multiple variables to the XSL, use the for-each element in the transformation. Optionally you can also build the schema using the "XML Fragment" assign operation and assign values to it
5. The processXSLT() function has 3 parameters. The first parameter holds the XSL file name, the second parameter is the input variable/data for the XSLT to process and the third parameter is the properties. We are now interested in the third parameter which helps us to pass the BPEL variables to the XSLT.
6. Pass the variable xslParameters (As created in step 2) as the third parameter as shown below;
ora:processXSLT('XSLT_File.xsl',bpws:getVariableData(’inputVariable’,'payload’),bpws:getVariableData('xslParameters '))
7. Now, you can obtain all the variable values inside the XSLT file using the <xsl:param name="variable1"/> instruction and you can use this just like a variable inside your XSL file

Wednesday, April 22, 2009

Customizing BPEL Process Instance Titles

When there were several BPEL process instances getting created in the BPEL console, it often really becomes hard to identify a instance for tracking/debugging purposes. Since, all the BPEL process instances use a generic naming convention consisting of an unique instance id (sequence generated within Oracle BPEL PM) and the BPEL process name; all instances would hold the same name except for the change in instance id.

In order to give a valid instance name for the BPEL processes, you can make use of the setTitle(String str1); method inside a Java Embedding activity inside the BPEL process, which will ensure that the 'str1' parameter is set as the instance title for all instances created for this BPEL process. You can pass dynamic run-time parameters and customize the BPEL instance titles, so that the BPEL instances can be identified more uniquely in a business sense. This also enables easy & effective instance tracking from the BPEL console.

Sunday, March 15, 2009

Pass Variables between Java & BPEL Process

When using Java embedding activity in a BPEL process for processing BPEL variables , it will be required to pass the variables between Java and the BPEL process. In such cases, you can use
the following methods to get/set the variables;

getVariableData(bpelVariable); method will fetch that variable value to be used inside the Java embedding activity

setVariableData(bpelVariable, Value); method sets the Value (processed in the Java embedding activity) to the bpelVariable, which can be used in the BPEL process for further processing.

However, the variable datatype conversions should be properly handled in BPEL process and Java embedding activity.

Saturday, March 14, 2009

Lost BPEL Instances? - Use Force Dehydration

There will be many instances when it will be really puzzling to find out whether the BPEL instance was triggered or not, where we often say that the "BPEL instance is lost". Actually, in reality, the BPEL process could have resulted in some kind of exception during the process which gets suppressed completely by the BPEL PM and the instance neither gets persisted or dehydrated in the orabpel schema nor shown up in BPELConsole.

This will be really troublesome, as we will not be able to identify whether the problem lies in the external system driving the BPEL instance or within the BPEL process itself after consumption of data. In such cases, you can use the checkpoint(); Java method inside a Java embedding activity to force the instance to be dehydrated as soon as the instance gets triggered in BPEL. This will ensure that the BPEL instance is shown up in the BPEL console if it is instantiated. You can use the following piece of code in your BPEL process to force dehydration.

<bpelx:exec name="CheckPointOne" language="java" version="1.5">
<![CDATA[checkpoint();]]>
</bpelx:exec>

Now, all your BPEL instances will be available in the BPELConsole for debugging issues that are not actually propagated/thrown to BPELConsole by the OPMN.

However, there are certain drawbacks while using the force dehydration mechanism, as this will cause drop in performance of the BPEL process during run-time due to the additional overhead of persisting the instance whenever this method is called. So please make justified use of this method before using this.

Sunday, February 22, 2009

Load XSL at runtime on the fly

While working for a project objective, we had lots of stylesheet (XSLT) files in the BPEL processes, which underwent frequent modifications. The XSL files were created and stored under a common folder inside the BPEL process, which required deployment of the BPEL process everytime we made changes to the stylesheets.

This seemed very bad and time consuming, as we were compiling and deploying the entire BPEL process even for the smallest change in the stylesheet. Then I found a solution where the BPEL process would be made to pick up / load the stylesheet during runtime which will be stored at some physical location under the $SOA_Home accessible via a http URL.

By dynamically constructing the http URL in the BPEL process, the BPEL process was able to load the stylesheets dynamically thereby eliminating the tight coupling between the stylesheet configuration & BPEL process.

# Create a folder called "xsl" (user-defined) under the following location;
$SOA_Home\bpel\system\xmllib

# Place all your XSLT files under the xsl folder

# Construct the dynamic HTTP URL as shown below for this folder location in your BPEL process

1. Create a copy operation under the Assign activity which will construct and store the http URL for the xsl folder, and assign the value to a variable; say xsl_variable
concat(substring-before(ora:getProcessURL(),ora:getDomainId()),'xmllib/xsl/',bpws:getVariableData('stylesheet1'))
2. Pass this variable (In this example xsl_variable) as the first parameter to the ora:processXSLT() function

After the above said modifications are performed, the stylesheets can be modified and copied into the xsl folder which will be loaded & transformed by the BPEL processes on the fly.

Sunday, February 8, 2009

Oracle BPEL HTTP Server Down after applying patch 10.1.3.3

We have encountered few issues while starting the oracle SOA suite after applying SOA patch 10.1.3.3. The HTTP server was still down after the SOA suite restart.

On analyzing the HTTP_Server~1.log file available under $SOA_Home\opmn\logs, the following error was logged.

Syntax error on line 278 of $SOA_Home/apache/apache/conf/httpd.conf:Cannot load $SOA_Home/apache/apache/modules/apachemoduleossl.dll into server: (127) The specified procedure could not be found

This issue might occur if there are few DLL files pertaining to SSL missing or unavailable for the HTTP server start. If you are not using the SSL advantage, then the quick fix is to comment out the following sections of httpd.conf file (Key in # infront of the line to comment).

<ifdefine>
LoadModule ossl_module modules/ApacheModuleOSSL.DLL
</ifdefine>


# Include the SSL definitions and Virtual Host container

include "D:\product\10.1.3.1\OracleAS_1\Apache\Apache\conf\ssl.conf"

Now, restart the Oracle SOA instance & the Http Server should run.

Tuesday, February 3, 2009

Oracle BPEL Remote Deployment using Ant

In the last post, we have seen how to compile & deploy the Oracle BPEL & ESB processes in the local OAS (Oracle Application Server on SOA Suite 10.1.3.3) using automated Ant build scripts. In this blog, I will try to explain the remote server deployment of Oracle BPEL processes.

This essentially means that we will be able to run the Ant build script on local machine & deploy the compiled code on to remotely located servers on the network. To explain this with a practical scenario, we can have a build server which has the completed build setup with 2 build scripts - One which will run at regular time intervals (Daily) to check for the integrity of builds & another which can be triggered at desired time to deploy on to test environments.

The following segment of code must be added on to the build script which does the remote server deployments.

Step 1:
Download the classes here and place them in the following location;

$Oracle_SOA_Home\bpel\system\classes\com\collaxa\cube\ant\taskdefs

Step 2:
Add the following task definition to your Ant build script.

<taskdef classname="com.collaxa.cube.ant.taskdefs.RemoteDeployOverHttp"
name="deploySuitcase">


Step 3:

Compile all the required BPEL processes, so that the corresponding jar files are generated in the output folders.

Step 4:

Add a target element in the Ant build script as shown below, which takes care of deploying the compiled BPEL processes to the remote Oracle SOA @ the domain specified.

<target name="deploy">
<deploySuitcase host="$host_ip" port="$SOA_port"
domain="default" password="$SOA_pwd">
<fileset dir="${basedir}">
<include name="bpel_Process1_1.0.jar"/>
</fileset>
</deploySuitcase>
</target>

The host_ip, SOA_port, SOA_pwd are parameters that will be extracted from the external properties file during run-time.

The <deploySuitcase> is the custom Ant task which takes care of deploying the jar files of compiles BPEL processes defined within the <fileset> element. You can included any number of BPEL jars that will be deployed to the remote server specified.

Courtesy: Clemen's SOA Blog

Monday, January 12, 2009

Oracle BPEL/ESB Automated Build using Ant

In this post, we will see how to use Apache Ant effectively in compiling & deploying Oracle BPEL/ESB projects. In any SDLC, we come across situations where it becomes very hard to detect the integrity of builds at earlier stages which leads to eleventh hour hiccups.
Ant build scripts comes to the rescue, providing custom tasks for compiling & deploying the Oracle BPEL & ESB projects in the OAS (We will see remote server deployments in subsequent posts).
Think of a script which runs at regular time intervals; say 2300 hrs every day and reports if there are any issues during compilation/deployment time. Wouldn't that be great to see the reports at your sight before getting along with development activities everyday. We made use of an open-source utility called "CruiseControl" for automating the Ant build scripts which we will see how to orchestrate.
Pre-Requisites:
  • Oracle SOA suite 10.1.3.3 installed and configured
  • Apache Ant 1.7.0
  • jaxb 2.0.0
  • commons-httpclient-3.0.1.jar
Identification of BPEL & ESB processes:
Before preparing the Ant build scripts, it is very essential to identify the Oracle BPEL & ESB candidates that would be subject to continuous integration. Also, it is important to capture the order of deployments of these processes.
Wrapper Ant build script:
We can write a wrapper Ant build script which will call the "automatically created" Ant build scripts while creation of BPEL processes & we will leverage the Ant task described in the next section to register ESB projects wherever required.
Compiling & Deploying Oracle BPEL processes:
By default, whenever an Oracle BPEL process is created in JDeveloper, an ant build script will be created which takes care of compiling and deploying that particular BPEL. For orchestrating the automated builds, we will take advantage of these build scripts to continuously integrate the BPEL processes.
Following piece of code shows the process of triggering the process-deploy Ant task available within the BPEL_Process1 BPEL project from the wrapper Ant script.
<target name="BPEL_Process1" description="run BPEL_Process1">
<property name="BPEL_Process1.file.path" value="#Location of BPEL_Process1"/>
<xmlproperty file="${BPEL_Process1.file.path}/bpel/bpel.xml"/>
<echo>Building BPEL_Process1...</echo>
<ant antfile="${BPEL_Process1.file.path}/build.xml" target="process-deploy">
<property name="basedir" value="${process.dir}/${BPEL_Process1.file.path}" />
<property name="process.name" value="BPEL_Process1"/>
</ant>
</target>

Registration of ESB Projects:
Ant comes up with a specialized task for registering the Oracle ESB projects into the SOA server.
1. Extract ESBMetadataMigration.jar from $SOA_Home\Integration\esb\deployment\documentation.zip
2. Modify the following properties in the ESBMetadataMigrationTaskdefs.xml
<project name="ESBMetadataMigrationTaskdefs">
<property name="commons.httpclient.home" value="#commons-httpclient jar location"/>
<property name="jaxb.v2.0.2.home" value="#jaxb jar location"/>
<property name="soa.suite.home" value="#Oracle_SOA_Home"/>
<property name="esb.home" value="#ESBMetadataMigration.jar location"/>
<!-- - - - - - - - - - - - - - - - - - - - - - - - - - - - - - - - - - - - - - - Custom ant task definitions, to enable import. - This section should be treated as immutable upon installation. - - - - - - - - - - - - - - - - - - - - - - - - - - - - - - - - - - - - -->
<dirname property="imported.basedir" file="${ant.file.ESBMetadataMigrationTaskdefs}"/>
<taskdef resource="oracle/tip/esb/client/anttasks/antlib.xml">
<classpath>
<pathelement location="${esb.home}/ESBMetadataMigration.jar"/>
<pathelement location="${commons.httpclient.home}/commons-httpclient-3.0.1.jar"/>
<pathelement location="${soa.suite.home}/lib/xmlparserv2.jar"/>
<pathelement location="${soa.suite.home}/integration/esb/lib/commons-logging.jar"/>
<pathelement location="${soa.suite.home}/integration/esb/lib/commons-codec-1.3.jar"/>
<pathelement location="${soa.suite.home}/integration/esb/lib/oraesb.jar"/>
<pathelement location="${jaxb.v2.0.2.home}/lib/activation.jar"/>
<pathelement location="${jaxb.v2.0.2.home}/lib/jaxb-api.jar"/>
<pathelement location="${jaxb.v2.0.2.home}/lib/jsr173_1.0_api.jar"/>
<pathelement location="${jaxb.v2.0.2.home}/lib/jaxb-impl.jar"/>
</classpath>
</taskdef>
</project>

3. Import the following config files in your ant build script
<import file="${bpel.home}/utilities/ant-orabpel.xml"/>
<import file="${ESBMetaDataLoc}/ESBMetadataMigrationTaskdefs.xml"/>

4. Final step to register the ESB projects;
<target name="ESB_1" description="run ESB_1">
<echo>Registering ESB_1...</echo>
<deployESBProjects esbMetadataServerHostname="${http.hostname}"
esbMetadataServerPort="${http.port}"
userName="${admin.user}"
password="${admin.password}">
<esbProject directory="${ESB_1.file.path}"/>
</deployESBProjects>
</target>

Configuring CruiseControl:
Now that we have written the wrapper Ant build script to orchestrate the Oracle BPEL/ESB deployments, we can make use of the <target> task to call each of the other targets in the necessary sequence using the 'depends' attribute.
This Ant script can now be made available in the CruiseControl tool which will take care of executing this build script at specified time intervals. config.xml is the CruiseControl configuration file available within the CruiseControl installation directory where we can configure various settings like time of build, mail triggers, reports etc...
A little deep dive into the CruiseControl configurations will allow you to configure css settings, mail templates etc...
Please post your comments if you need clarifications/help which I will try to resolve ASAP.

Thursday, January 1, 2009

Oracle BPEL console throws 'No domains accessible to the user logged in.'

A common issue that is faced in Oracle BPEL development phase by a developer is "No domains accessible to the user logged in." This might be due to several reasons which I will try to elaborate in this blog based on my past experience in resolving this issue.

Check 1:
First checkpoint where we can identify the detail of error description is checking the following log files;
Domain Log: $SOA_Home\bpel\domains\default\logs\domain.log ('default' is the default domain name)
- This log file will be created everytime the SOA service is started and will log any domain level startup issues
OPMN Log: $SOA_Home\opmn\logs\OC4J~oc4j_soa~default_group~1.log
- This log file will log all the BPEL process specific logs (creation/termination)
System Log: $SOA_Home\bpel\system\logs\orabpel.log
- System level logging is provided for infrastructure, AXIS, and WSIF issues

All these log files should give a clear picture about the error which might be causing this issue, based on which you can take necessary actions.

Check 2:
Check whether the database on top of which Oracle SOA suite was installed is up & running. If not, ensure the RDBMS listener is running & restart SOA service.

Check 3:
The Oracle SOA suite will be installed on top of a database (Oracle Lite/external Oracle DB), where three schemas would have been created during installation namely Orabpel, Oraesb, Orawsm. These schemas might have got corrupted (or) their passwords might have got changed which throws "No domains accessible to the user logged in." error in Oracle BPEL console. Ensure all 3 schemas are present in the database and their passwords are intact as specified in the datasources.xml/during installation and restart SOA service after corrections.

Check 4:
If any class files have been added in the SOA suite, ensure they are properly compiled and deployed @ $SOA_Home\bpel\system\classes.

Check 5:
If you have added any custom xpath functions for use in the BPEL process, you might have added entries in the $SOA_Home/bpel/system/config/xpath-functions.xml. Ensure that this file is well formed.

Check 6:
If you have deployed any BPEL process recently after which the Oracle BPEL console throws this error, there might be high chance for issues in the deployed BPEL process.
All deployed BPEL processes will be picked up from the following location. Take backup of the existing processes, delete all entries and then restart SOA service.
$SOA_Home\bpel\domains\default\tmp ('default' is the default domain name)

One or more of the above described checks should resolve this issue.