Showing posts with label SOA 11g. Show all posts

Thursday, September 8, 2016

Learner Series: SOA 12c Share Resources easily using MDS

SOA 12c has simplified the way developers leverage the MDS capabilities.

Developers still have the 11g way of deploying "SOA Bundle" archives to MDS described here.
But if you are on SOA 12c, you get a simpler option.

Once you install SOA 12c quickstart, you get a file-based SOA DesignTime MDS Repository by default. You can choose where to host your MDS root.

Under the Resources window in JDeveloper, expand SOA-MDS IDE connection. You must have a default SOA_DesignTimeRepository. Go to properties and set your MDS root folder.


You can copy your resources that you want to reuse/share to your MDS root folder and reference them within your SOA composite by using the oramds:/ protocol. eg., oramds:/apps/xsd/employee.xsd

Now to create a runtime MDS repository, first create a DB MDS connection to your SOA instance using your prefix_MDS schema [prefix is what you specified during RCU config].

From the Resources window -> IDE connection panel, right click SOA-MDS and create a new SOA-MDS connection. Provide a unique connection name, choose Connection type as "DB Based MDS", select the MDS connection created above and choose the "soa-infra" partition.

Note: SOA quickstart by default uses Java derby database (no DB MDS capabilities). You must either have a compact domain installation or a full-fledged SOA installation (your staging / test / production server).

To deploy the design time MDS (file-based) resources to DB based runtime MDS repository, right click on the design time repository and choose Transfer. The wizard will prompt you for the runtime MDS to which the resources must be transferred to. Choose the resources you need to transfer and your DB MDS connection and click on Transfer.

Friday, July 29, 2016

Learner Series: Handling Dynamic Arrays in SOA 12c (BPEL 2.0)

Dynamic arrays are always tricky to handle within a BPEL process. Every now and then we encounter XML schemas that have generic name-value pair arrays that are unbounded. The challenge is assigning data to and from these dynamic arrays as there are no concrete XML target elements at runtime. Hence, the XML elements must be generated first before assigning values to them.

There are multiple ways this problem can be solved.

For one, you can choose XSLT over a simple assign. XSLT wields more granular control over how the XML elements are handled. You can instruct the XSL processor to loop over dynamic array list and assign values. This of course requires some level of XSLT skill (Although JDeveloper presents an easy XSL mapper, I prefer fiddling with the source) and in certain cases, you may have to pass some BPEL variables (properties) to XSLT in additions to the source and target variables.

Second option would be to use an XML literal (called XML fragment in BPEL 1.1) within your assign activity. Here you can pre-form the XML literal, assign it to the target and then map the values. Not so sophisticated and if you are not careful with namespaces, this could cause a lot of mapping troubles.

Thirdly, with BPEL 2.0 you can simply add an attribute to your copy action in your assign activity to achieve the same. Most simplest of all.

Since this is a learner series, let's get into some details on how to go about this;

Let's first understand the root-cause of the error;

The problem with assigning dynamic arrays within BPEL is that, for the first element in the array, since the XML element is always "available", the copy happens successfully.
However, starting with the second element, all copy rules within assign would fail due to a "selection failure" with the following error because the dynamic array XML elements are still not formed or is empty.

"Exception is thrown because the to-spec at line 140 is evaluated to be empty"
or
"Exception is thrown because the from-spec at line 160 is evaluated to be empty"

depending on whether you are trying to copy to a target or copy from a source.

Your XML schema containing dynamic array may look something like this;


Your typical assign would like the following - you will have to manually let BPEL know which element the values must be mapped - [1], [2], [3] .... [n]. Just append this to your root XML element which contains the dynamic array. In this case;


Now, starting with the second copy rule within your assign, right-click on the rule item and select "ignoreMissingFromData" or "insertMissingToData" depending on whether your dynamic array is being read or written to respectively.


This action would add a flag (attribute) to the copy rule instructing BPEL to handle the dynamic XML element - either ignore or insert.

<copy bpelx:insertMissingToData="yes">
or
<copy bpelx:ignoreMissingFromData="yes">

Happy BPELing...

Friday, May 30, 2014

Installing OER 11g on an existing SOA 11g domain

In this blog post, I will provide detailed step-by-step instructions to install OER 11g (11.1.1.7) on an existing SOA domain.

Pre-Requisites: SOA 11g installed and domain configured. I used 11.1.1.7 version (latest version as on date of writing this post)

You can choose to have a single server install where AdminServer doubles up as SOA server or have 2 managed servers (Admin & SOA) on your domain. You will have to install OER as a separate managed server. I personally couldn't succeed with a OER single server install (Admin + SOA + OER on the same managed server).

Installing OER 11.1.1.7

Step 1: Connect to the database on your server as SYS user and execute the following scripts. This step is an important pre-requisite as it creates the tablespace and schema to store OER asset/artifact metadata

Note: Ensure that the path to DATAFILE parameter exists

Create Tablespaces:

CREATE TABLESPACE OER_DATA
    DATAFILE '/u01/app/oracle/oradata/XE/oer_data.dbf' SIZE 300M
 AUTOEXTEND ON NEXT 10240K MAXSIZE UNLIMITED
    EXTENT MANAGEMENT LOCAL AUTOALLOCATE
    LOGGING
    ONLINE
    SEGMENT SPACE MANAGEMENT AUTO;

CREATE TABLESPACE OER_LOB
    DATAFILE '/u01/app/oracle/oradata/XE/oer_lob.dbf' SIZE 300M
 AUTOEXTEND ON NEXT 10240K MAXSIZE UNLIMITED
    EXTENT MANAGEMENT LOCAL AUTOALLOCATE
    LOGGING
    ONLINE
    SEGMENT SPACE MANAGEMENT AUTO;

CREATE TABLESPACE OER_INDEX
    DATAFILE '/u01/app/oracle/oradata/XE/oer_index.dbf' SIZE 300M
 AUTOEXTEND ON NEXT 5120K MAXSIZE UNLIMITED
    EXTENT MANAGEMENT LOCAL AUTOALLOCATE
    LOGGING
    ONLINE
    SEGMENT SPACE MANAGEMENT AUTO;

Create OER Schema:
  
CREATE USER OER IDENTIFIED BY OER_PWD
DEFAULT TABLESPACE OER_DATA
TEMPORARY TABLESPACE TEMP;

Apply Grants:

GRANT CREATE MATERIALIZED VIEW TO OER;
GRANT CREATE SEQUENCE TO OER;
GRANT CREATE SESSION TO OER;
GRANT CREATE SYNONYM TO OER;
GRANT CREATE TABLE TO OER;
GRANT CREATE TRIGGER TO OER;
GRANT CREATE VIEW TO OER;
GRANT UNLIMITED TABLESPACE TO OER;

Step 2:
Download the appropriate installer for your server. If you are on a 64-bit machine, irrespective of whether it is Windows or Linux, you can choose to download the generic installer.

Unzip the ofm_oer_generic_11.1.1.7.0_disk1_1of1.zip file into a server location

Step 3:
Ensure java is on your environment PATH variable and execute the following command

java -D64 -jar OER111170_generic.jar

Step 4:
In the welcome screen of the OER installer, click Next

Step 5:
Choose your existing FMW home (in this case your home directory where SOA is installed - Since we are installing OER on the same domain as SOA) and click Next

Step 6:
Validate the Oracle Enterprise Repository install location and click Next

Step 7:
Choose WebLogic Server 11 in the "Choose Application Server" dialog and click Next

Step 8:
In the "Initialize Repository Properties" screen, enter the following values and click Next

OER managed server port number: 7101 (default, but you can choose to change it here)
Fully qualified server name: Enter the fully qualified server hostname
Repository application name: oer


Step 9:
In the "Configure Database" screen, choose Yes to configure the database for OER and click Next

Step 10:
Enter the following values in the "Provide Database Tablespace Names" screen

Data tablespace: oer_data
BLOB tablespace: oer_lob
Index tablespace: oer_index

Step 11:
In the "Initialize Repository Database Properties" browse for the ojdbc6.jar driver file - This file can be found at the database installation location: <DB_Home>/jdbc/lib

Provide the DBMS (SID) name, host, port and OER username and password and click Next

Step 12:
You must now see a successful installation message.

Extend SOA Domain to host OER

Step 13:
Go to <Middleware_Home>/wlserver_10.3/common/bin and execute config.sh
./config.sh

Step 14:
In the "Configuration Wizard" home screen, choose the option "Extend an existing WebLogic domain" and click Next


Step 15:
Choose your WebLogic domain where SOA suite is installed

Step 16:
Scroll down the list of products, select Oracle Enterprise Repository - 11.1.1.7.0 from the list and click Next

Step 17:
Leave defaults and click Next in the following screens until you reach the "Select Optional Configuration" page

Step 18:
In the "Select Optional Configuration" screen, select "Managed Servers, Clusters and Machines" option and click Next

Step 19:
Leave defaults in the following screens and in the Configuration Summary page, click on "Extend"

You must see "Domain Extension Applied Successfully" message

Now that your domain has been extended, the domain configuration corrupts a few configuration settings that prevents a successful server startup. Follow the instructions below to get OER started successfully.

Observation 1:

I observed that the UMSJMSSystemResource-jms.xml presents duplicate entries which prevents a successful server startup. To resolve this, go to <Domain_Home>/config/jms folder and check and remove the duplicate entries as highlighted below. [Note: Take a backup of this file]

<queue name="OraSDPM/Queues/OraSDPMEngineCmdQ_auto_3">
    <sub-deployment-name>UMSJMSServer505614749</sub-deployment-name>
    <jndi-name>OraSDPM/Queues/OraSDPMEngineCmdQ</jndi-name>
  </queue>
  <queue name="OraSDPM/Queues/OraSDPMEngineSndQ1_auto_3">
    <sub-deployment-name>UMSJMSServer505614749</sub-deployment-name>
    <jndi-name>OraSDPM/Queues/OraSDPMEngineSndQ1</jndi-name>
  </queue>
  <queue name="OraSDPM/Queues/OraSDPMEngineRcvQ1_auto_3">
    <sub-deployment-name>UMSJMSServer505614749</sub-deployment-name>
    <jndi-name>OraSDPM/Queues/OraSDPMEngineRcvQ1</jndi-name>
  </queue>
  <queue name="OraSDPM/Queues/OraSDPMDriverDefSndQ1_auto_3">
    <sub-deployment-name>UMSJMSServer505614749</sub-deployment-name>
    <jndi-name>OraSDPM/Queues/OraSDPMDriverDefSndQ1</jndi-name>
  </queue>
  <queue name="OraSDPM/Queues/OraSDPMAppDefRcvQ1_auto_3">
    <sub-deployment-name>UMSJMSServer505614749</sub-deployment-name>
    <jndi-name>OraSDPM/Queues/OraSDPMAppDefRcvQ1</jndi-name>
  </queue>
  <queue name="OraSDPM/Queues/OraSDPMWSRcvQ1_auto_3">
    <sub-deployment-name>UMSJMSServer505614749</sub-deployment-name>
    <jndi-name>OraSDPM/Queues/OraSDPMWSRcvQ1</jndi-name>
</queue>

Observation 2:

The memory setting of your SOA domain would be affected because the setOERDomainEnv.sh script gets called every time. Sophisticated way of handling this would be at the setSOADomainEnv.sh where you can validate the $SERVER_NAME and configure the USER_MEM_ARGS for each Managed Server appropriately. Else, just increase the USER_MEM_ARGS in the setOERDomainEnv.sh script.

Now, you are all set to start your OER server and start SOA Governance !!

Saturday, March 1, 2014

JDeveloper Deployment to SSL Configured WebLogic (SSL Handshake Failure)

If you have configured SSL keystore on your WebLogic application server, you might face SSL Handshake error while trying to deploy any application from Oracle JDeveloper.

To overcome this issue, download the SSL certificate and import it to your JDeveloper java keystore.

1. Open your browser and establish an SSL connection to your server. For eg., https://hostname:port/console

2. Click on the green padlock sign -> Connection tab and click on Certificate Information

3. In the Certificate dialog, click on "Copy to File.."

4. In the resulting "Certificate Export Wizard", choose Next


5. Leave the default selection (DER encoded binary X.509) and click Next

6. Provide a filename where the certificate file will be exported and saved

Import certificate into the Java keystore: [Ensure that this is the java that JDeveloper points at]

1. Open command prompt, go to <Java_Home>\jre\bin

2. Issue the following command to import the server SSL certificate to java keystore for successful handshake;

keytool -import -v -file C:\Temp\root.cer -keypass password -keystore C:\Java\jdk6u33\jre\lib\security\cacerts -alias mykey

3. When prompted, provide the keystore password [Default password is changeit]

Voila, now you are all set to deploy applications from JDeveloper !!

OSR on OER/SOA/OSB domain - QName violates loader constraints

Recently i had installed OSR on the same domain where my SOA, OSB and OER co-exists. While starting the OSR managed server, I faced the following error;

<Error> <HTTP> <soabpm-vm.site> <osr_server1> <[ACTIVE] ExecuteThread: '0' for queue: 'weblogic.kernel.Default (self-tuning)'> <<WLS Kernel>>
<BEA-101017> <[ServletContext@470316600[app:registry module:registry.war path:/registry spec-version:null]] Root cause of ServletException.
java.lang.LinkageError: Class javax/xml/namespace/QName violates loader constraints
at com.idoox.wsdl.extensions.PopulatedExtensionRegistry.(PopulatedExtensionRegistry.java:84)
at com.idoox.wsdl.factory.WSDLFactoryImpl.newDefinition(WSDLFactoryImpl.java:61)
at com.idoox.wsdl.xml.WSDLReaderImpl.parseDefinitions(WSDLReaderImpl.java:419)
at com.idoox.wsdl.xml.WSDLReaderImpl.readWSDL(WSDLReaderImpl.java:309)
at com.idoox.wsdl.xml.WSDLReaderImpl.readWSDL(WSDLReaderImpl.java:272)
at com.idoox.wsdl.xml.WSDLReaderImpl.readWSDL(WSDLReaderImpl.java:198)
at com.idoox.wsdl.util.WSDLUtil.readWSDL(WSDLUtil.java:126)

This blog here helped me get rid of the error.

Saturday, February 8, 2014

BPM Workspace/Composer Login Error ORABPEL-10585

If you are facing trouble logging into BPM workspace or composer, this post could help save you some time.

First check if the error message in your SOA managed server diagnostic log after the failed login is the following;

javax.security.auth.login.LoginException: Operation exception.
at oracle.bpm.papi.ora.mgr.OrganizationManager.lookupParticipant(OrganizationManager.java:61)
at oracle.bpm.papi.ora.mgr.OrganizationManager.lookupParticipant(OrganizationManager.java:41)
..........
..........
Caused by: fuego.papi.OperationException: Operation exception.
... 69 more
Caused by: ORABPEL-10585

Service error.
Internal Error; Service error occurs in IdentityService in method lookupUser.
Refer to the log file that is configured for oracle.soa.services.identity for more details on this error and contact Oracle Support Services

If this is not the error in your logs, you may look at the blog post here for other options to see if that helps resolve your problem.

Now, let us look at the fix.

1. Login to the EM (Enterprise Manager) console
2. Expand SOA and Right click on soa-infra
3. Goto Administration -> System MBean Browser
4. Minimize the tree structure (com.bea) to view Application Defined MBeans section
5. Expand oracle.as.soainfra.config -
> Server:SOAServerName -> SoaInfraConfig
6. Select soa-infra
7. Update the property ServerURL with a valid URL [Ensure that the hostname here matches your environment hostname. Tip: It should be same as the front end host]

eg., http://hostname:port
8. Click on Apply


Restart your SOA managed server. You should now be able to successfully login to your BPM Workspace or Composer

Friday, November 22, 2013

Oracle SOA 11g HTTP POST Send/Receive (with example)

In this post let us see how to send and consume HTTP POST request using SOA 11g.

Sample attached with this post will send a file in base64encoded format as a HTTP POST request and the same will be consumed by another BPEL process which is exposed to consume the file in HTTP protocol.

We will use the following XML schema (XSD) to build our HTTP POST service;
Exposing a SOA 11g BPEL process as a HTTP service (POST):

Step 1: Create a SOA Project with empty composite and name it "HttpPostRestService"

Step 2: Drag and Drop a HTTP Binding adapter on the "Exposed Services" swimlane in the SOA composite (SCA)

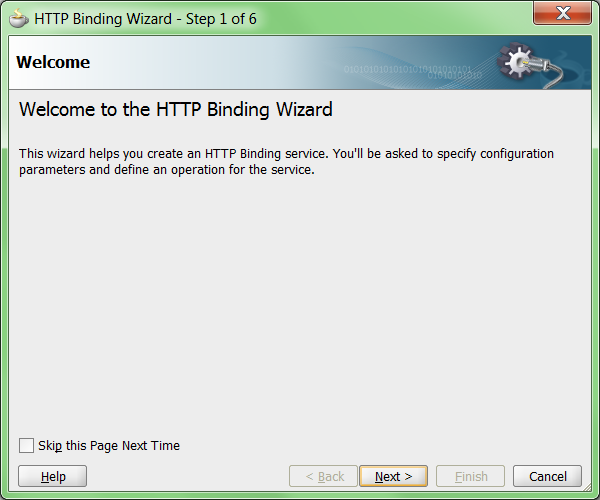
Step 3: Choose Next in the Welcome page of the wizard


Step 4: Enter service name

Step 5: Choose "Define from operation and schema (specified later)" option

Step 6: Choose the following options and click Next

Type: Service [You will choose "Reference" if you need to consume a HTTP REST service]
Operation Type: Request-Response [For 2-way communication. Choose One-way if the service doesn't return a response]
Operation Name: Defaults to Request-Response [You can change it as you please]
Verb: POST [This specifies the HTTP method. You have 2 options GET/POST]
Payload Type: XML [For HTTP POST, you get 2 options url-encoded and XML. Since our payload will be huge, url-encoded will not make sense due to size restrictions]


Step 7: In the Messages dialog, select the RestPost.xsd, <Input> and <Response> XML elements for "Request Message Schema" & "Response Message Schema" respectively.

Step 8: In the summary page, click "Finish" to complete service

Now that we have completed the HTTP binding service adapter which will expose the SOA 11g BPEL process as a HTTP service, you can choose to build a BPEL process which will consume the POST message for further processing.

Deploy the completed process and obtain the HTTP service URL from EM console. We will invoke this service from another SOA composite.

Consuming a HTTP (POST) service in SOA 11g BPEL process:

Step 1: Create a SOA Project with empty composite and name it "InvokeHttpPostService"

Step 2: Drag and Drop a HTTP Binding adapter on to the "External References" swimlane in the SOA composite (SCA)

Step 3: Choose Next in the Welcome page of the wizard


Step 4: Enter service name

Step 5: Choose "Define from operation and schema (specified later)" option

Step 6: Choose the following options and click Next

Type: Reference [Since we are consuming a HTTP service - POST]
Operation Type: Request-Response [Default selection for references]
Operation Name: Request-Response [Default]
Verb: POST [This specifies the HTTP method that will be invoked]
Payload Type: XML
Endpoint: Provide the HTTP URL for the REST service to be invoked.


Step 7: In the Messages dialog, select the RestPost.xsd, <Input> and <Response> XML elements for "Request Message Schema" & "Response Message Schema" respectively.

Step 8: In the summary screen, click Finish to complete the service adapter

Now, build and complete your SOA composite which will invoke a HTTP service using POST method.

Source code can be downloaded here

Let me know your thoughts in comments section.

Thursday, November 14, 2013

Processing No Namespace XML Messages SOA 11g

Many a time, we encounter messages that are communicable but grammatically unsound.

Applying the analogy of modern day SMS (Simple Messaging Service) or IM (Instant Messaging) conversations, where messages communicated are something like shown below.

hw r u?
doin grt
wassup?

Although these convey intents, yet if you lookup these on a dictionary you will never be able to find a synonym :)

Often in IT sphere, especially in service-oriented architectures where XML is bread & butter, we see transactions from external sources which are XML-ish which are well-formed but doesn't subscribe/conform to a grammar (XSD).

This is more prevalent in cases where XML is constructed by a legacy system where namespaces are ignored.

Okay, how do we then process these XML messages - we don't have any control whatsoever on the sender/generation of the message.

Consider the following example;

<?xml version="1.0" encoding="UTF-8" ?>
<Order>
    <OrderNumber>101</OrderNumber>
    <ProductName>Apple IPad</ProductName>
    <Description>32 GB</Description>
    <Quantity>1</Quantity>
    <Cost>899</Cost>
</Order>

We are facing the same situation as the aforesaid analogy - Although the XML document is well-formed, ensures data integrity, it just doesn't conform to the rule book and hence SOA rejects messages that are not grammatically sound.

If you try and generate a XML schema from the above XML, the XSD will have a target namespace associated.
Based on this XSD, if the SOA project & XML transformations (XSLT) are built, the incoming XML in the above format will not be processed as it doesn't exactly conform to the XSD (No Namespace Definition).

In such cases, XSD must be manually edited to remove targetnamespace and namespace prefixes.

Also, XSLT transformations must be edited based on incoming XML. If there are no namespace, then remove the namespace prefixes in your XPath - disassociating elements from the namespace.

In a little more complex scenario, you may encounter XMLs in the following format (Notice the empty namespaces in sub-elements);

<?xml version="1.0" encoding="UTF-8" ?>
<Order xmlns="http://www.sathyam-soa.blogspot.com">
    <OrderNumber xmlns="">101</OrderNumber>
    <ProductName xmlns="">Apple IPad</ProductName>
    <Description xmlns="">32 GB</Description>
    <Quantity xmlns="">1</Quantity>
    <Cost xmlns="">899</Cost>
</Order>

In this case, the XML document will be consumed successfully by your SOA project but transformations (XSLT) will not be successful. This is because of the empty namespace URIs in the sub-elements although root element contains the proper namespace as per XSD.

To resolve transformation issues, ensure that in your XSLT/XPath, the namespace prefixes for all elements with empty namespace URIs are removed.

/tns:Order/tns:OrderNumber
/tns:Order/tns:Quantity

must be modified to reflect as shown below

/tns:Order/OrderNumber
/tns:Order/Quantity

Reason: Although the root element in the XML document <Order> is qualified with a namespace, empty namespaces for child nodes (xmlns="") negates the qualification and hence these will become hanging nodes.

Learner Series: Build/Consume HTTP REST Services in SOA 11g (with example)

Today REST (Representational State Transfer) has become a norm for building services on the web. REST brings along its own merits & demerits - choice of REST vs SOAP/WSDL, when and where is an architectural decision. So, how does Oracle SOA BPEL support HTTP based RESTful web services.

For all HTTP based interactions, Oracle SOA 11g provides an out-of-box HTTP Binding adapter.

This post will illustrate the following;

a) Expose a SOA 11g BPEL process as a HTTP REST service
b) Consume/Invoke a HTTP REST service from a SOA 11g BPEL process [We will consume service that we will build as part of (a)]

As part of this exercise, we will build a REST service that will take customer name & id as input and greets the customer.

Before dunking into building the SOA composites, let's quickly take a look at the XML schema that will form the REST service contract.
Exposing SOA 11g BPEL Process as HTTP REST service:

Step 1: Create a SOA Project with empty composite and name it "HttpGetRestService"

Step 2: Drag and Drop a HTTP Binding adapter on the "Exposed Services" swimlane in the SOA composite (SCA)

Step 3: Choose Next in the Welcome page of the wizard

Step 4: Enter service name
 Step 5: Choose "Define from operation and schema (specified later)" option
Step 6: Choose the following options and click Next

Type: Service [You will choose "Reference" if you need to consume a HTTP REST service]
Operation Type: Request-Response [For 2-way communication. Choose One-way if the service doesn't return a response]
Operation Name: Defaults to Request-Response [You can change it as you please]
Verb: GET [This specifies the HTTP method. You have 2 options GET/POST]
Payload Type: url-encoded [For HTTP GET method, SOA 11g support only payload type of url-encoded (name-value pairs). For HTTP POST, you get 2 options url-encoded and XML]


Step 7: In the Messages dialog, select the GreetCustomer.xsd, <CustomerInput> and <Response> XML elements for "Request Message Schema" & "Response Message Schema" respectively.

Step 8: In the summary page, click "Finish" to complete service

Now, drag and drop a BPEL Process on the "Components" section.

Name the process as "GreetCustomerProcess" and choose to define service later.
You can now proceed to build the BPEL process as you please. As part of this sample, I have concatenated the customer name input with "Welcome" prefix so that the service returns the greeting as response.

Finally, deploy this project to your SOA server.

On deployment you can notice that the service is exposed both as a WSDL based webservice and HTTP based REST service. This will enable clients to interface through either standards.


You can test this service either via Enterprise Manager (EM) console - test mode or via normal browser.

For testing your SOA 11g based HTTP service refer to my blog entry here

Consuming a HTTP REST service in SOA 11g BPEL process:

Step 1: Create a SOA Project with empty composite and name it "InvokeHttpGetService"

Step 2: Drag and Drop a HTTP Binding adapter on to the "External References" swimlane in the SOA composite (SCA)

Step 3: Choose Next in the Welcome page of the wizard

Step 4: Enter service name
 Step 5: Choose "Define from operation and schema (specified later)" option
Step 6: Choose the following options and click Next

Type: Reference [Since we are consuming a HTTP REST service]
Operation Type: Request-Response [Default selection for references]
Operation Name: Request-Response [Default]
Verb: GET [This specifies the HTTP method. You have 2 options GET/POST]
Payload Type: url-encoded [Default]
Endpoint: Provide the HTTP URL for the REST service to be invoked. In this case, you can obtain the HTTP URL from enterprise manager console.

Step 7: In the Messages dialog, select the GreetCustomer.xsd, <CustomerInput> and <Response> XML elements for "Request Message Schema" & "Response Message Schema" respectively.


Step 8: In the summary screen, click Finish to complete the service adapter

Now, drag and drop a BPEL Process on to the Components section of your SOA composite. Provide a name to the process, accept other defaults and click OK

Wire the BPEL process with the HTTP Binding adapter in the SOA composite.

Inside the BPEL process, just map the input payload element to the <Name> element of the greeting rest service and deploy to SOA server.

You can now test and check both SOA services in action. One will expose itself as a REST service and the other will invoke it.

Source code can be downloaded here

Let me know your thoughts in comments section.