Showing posts with label soa-infra. Show all posts

Thursday, September 8, 2016

Learner Series: SOA 12c Share Resources easily using MDS

SOA 12c has simplified the way developers leverage the MDS capabilities.

Developers still have the 11g way of deploying "SOA Bundle" archives to MDS described here.
But if you are on SOA 12c, you get a simpler option.

Once you install SOA 12c quickstart, you get a file-based SOA DesignTime MDS Repository by default. You can choose where to host your MDS root.

Under the Resources window in JDeveloper, expand SOA-MDS IDE connection. You must have a default SOA_DesignTimeRepository. Go to properties and set your MDS root folder.


You can copy your resources that you want to reuse/share to your MDS root folder and reference them within your SOA composite by using the oramds:/ protocol. eg., oramds:/apps/xsd/employee.xsd

Now to create a runtime MDS repository, first create a DB MDS connection to your SOA instance using your prefix_MDS schema [prefix is what you specified during RCU config].

From the Resources window -> IDE connection panel, right click SOA-MDS and create a new SOA-MDS connection. Provide a unique connection name, choose Connection type as "DB Based MDS", select the MDS connection created above and choose the "soa-infra" partition.

Note: SOA quickstart by default uses Java derby database (no DB MDS capabilities). You must either have a compact domain installation or a full-fledged SOA installation (your staging / test / production server).

To deploy the design time MDS (file-based) resources to DB based runtime MDS repository, right click on the design time repository and choose Transfer. The wizard will prompt you for the runtime MDS to which the resources must be transferred to. Choose the resources you need to transfer and your DB MDS connection and click on Transfer.

Saturday, February 8, 2014

BPM Workspace/Composer Login Error ORABPEL-10585

If you are facing trouble logging into BPM workspace or composer, this post could help save you some time.

First check if the error message in your SOA managed server diagnostic log after the failed login is the following;

javax.security.auth.login.LoginException: Operation exception.
at oracle.bpm.papi.ora.mgr.OrganizationManager.lookupParticipant(OrganizationManager.java:61)
at oracle.bpm.papi.ora.mgr.OrganizationManager.lookupParticipant(OrganizationManager.java:41)
..........
..........
Caused by: fuego.papi.OperationException: Operation exception.
... 69 more
Caused by: ORABPEL-10585

Service error.
Internal Error; Service error occurs in IdentityService in method lookupUser.
Refer to the log file that is configured for oracle.soa.services.identity for more details on this error and contact Oracle Support Services

If this is not the error in your logs, you may look at the blog post here for other options to see if that helps resolve your problem.

Now, let us look at the fix.

1. Login to the EM (Enterprise Manager) console
2. Expand SOA and Right click on soa-infra
3. Goto Administration -> System MBean Browser
4. Minimize the tree structure (com.bea) to view Application Defined MBeans section
5. Expand oracle.as.soainfra.config -
> Server:SOAServerName -> SoaInfraConfig
6. Select soa-infra
7. Update the property ServerURL with a valid URL [Ensure that the hostname here matches your environment hostname. Tip: It should be same as the front end host]

eg., http://hostname:port
8. Click on Apply


Restart your SOA managed server. You should now be able to successfully login to your BPM Workspace or Composer

Friday, November 22, 2013

Oracle SOA 11g HTTP POST Send/Receive (with example)

In this post let us see how to send and consume HTTP POST request using SOA 11g.

Sample attached with this post will send a file in base64encoded format as a HTTP POST request and the same will be consumed by another BPEL process which is exposed to consume the file in HTTP protocol.

We will use the following XML schema (XSD) to build our HTTP POST service;
Exposing a SOA 11g BPEL process as a HTTP service (POST):

Step 1: Create a SOA Project with empty composite and name it "HttpPostRestService"

Step 2: Drag and Drop a HTTP Binding adapter on the "Exposed Services" swimlane in the SOA composite (SCA)

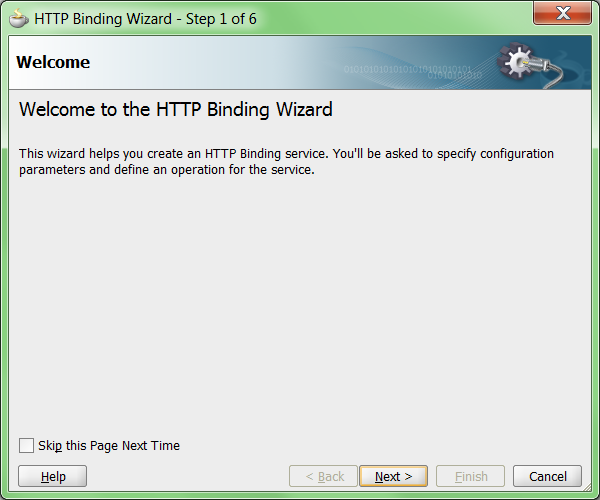
Step 3: Choose Next in the Welcome page of the wizard


Step 4: Enter service name

Step 5: Choose "Define from operation and schema (specified later)" option

Step 6: Choose the following options and click Next

Type: Service [You will choose "Reference" if you need to consume a HTTP REST service]
Operation Type: Request-Response [For 2-way communication. Choose One-way if the service doesn't return a response]
Operation Name: Defaults to Request-Response [You can change it as you please]
Verb: POST [This specifies the HTTP method. You have 2 options GET/POST]
Payload Type: XML [For HTTP POST, you get 2 options url-encoded and XML. Since our payload will be huge, url-encoded will not make sense due to size restrictions]


Step 7: In the Messages dialog, select the RestPost.xsd, <Input> and <Response> XML elements for "Request Message Schema" & "Response Message Schema" respectively.

Step 8: In the summary page, click "Finish" to complete service

Now that we have completed the HTTP binding service adapter which will expose the SOA 11g BPEL process as a HTTP service, you can choose to build a BPEL process which will consume the POST message for further processing.

Deploy the completed process and obtain the HTTP service URL from EM console. We will invoke this service from another SOA composite.

Consuming a HTTP (POST) service in SOA 11g BPEL process:

Step 1: Create a SOA Project with empty composite and name it "InvokeHttpPostService"

Step 2: Drag and Drop a HTTP Binding adapter on to the "External References" swimlane in the SOA composite (SCA)

Step 3: Choose Next in the Welcome page of the wizard


Step 4: Enter service name

Step 5: Choose "Define from operation and schema (specified later)" option

Step 6: Choose the following options and click Next

Type: Reference [Since we are consuming a HTTP service - POST]
Operation Type: Request-Response [Default selection for references]
Operation Name: Request-Response [Default]
Verb: POST [This specifies the HTTP method that will be invoked]
Payload Type: XML
Endpoint: Provide the HTTP URL for the REST service to be invoked.


Step 7: In the Messages dialog, select the RestPost.xsd, <Input> and <Response> XML elements for "Request Message Schema" & "Response Message Schema" respectively.

Step 8: In the summary screen, click Finish to complete the service adapter

Now, build and complete your SOA composite which will invoke a HTTP service using POST method.

Source code can be downloaded here

Let me know your thoughts in comments section.

Thursday, November 14, 2013

Learner Series: Build/Consume HTTP REST Services in SOA 11g (with example)

Today REST (Representational State Transfer) has become a norm for building services on the web. REST brings along its own merits & demerits - choice of REST vs SOAP/WSDL, when and where is an architectural decision. So, how does Oracle SOA BPEL support HTTP based RESTful web services.

For all HTTP based interactions, Oracle SOA 11g provides an out-of-box HTTP Binding adapter.

This post will illustrate the following;

a) Expose a SOA 11g BPEL process as a HTTP REST service
b) Consume/Invoke a HTTP REST service from a SOA 11g BPEL process [We will consume service that we will build as part of (a)]

As part of this exercise, we will build a REST service that will take customer name & id as input and greets the customer.

Before dunking into building the SOA composites, let's quickly take a look at the XML schema that will form the REST service contract.
Exposing SOA 11g BPEL Process as HTTP REST service:

Step 1: Create a SOA Project with empty composite and name it "HttpGetRestService"

Step 2: Drag and Drop a HTTP Binding adapter on the "Exposed Services" swimlane in the SOA composite (SCA)

Step 3: Choose Next in the Welcome page of the wizard

Step 4: Enter service name
 Step 5: Choose "Define from operation and schema (specified later)" option
Step 6: Choose the following options and click Next

Type: Service [You will choose "Reference" if you need to consume a HTTP REST service]
Operation Type: Request-Response [For 2-way communication. Choose One-way if the service doesn't return a response]
Operation Name: Defaults to Request-Response [You can change it as you please]
Verb: GET [This specifies the HTTP method. You have 2 options GET/POST]
Payload Type: url-encoded [For HTTP GET method, SOA 11g support only payload type of url-encoded (name-value pairs). For HTTP POST, you get 2 options url-encoded and XML]


Step 7: In the Messages dialog, select the GreetCustomer.xsd, <CustomerInput> and <Response> XML elements for "Request Message Schema" & "Response Message Schema" respectively.

Step 8: In the summary page, click "Finish" to complete service

Now, drag and drop a BPEL Process on the "Components" section.

Name the process as "GreetCustomerProcess" and choose to define service later.
You can now proceed to build the BPEL process as you please. As part of this sample, I have concatenated the customer name input with "Welcome" prefix so that the service returns the greeting as response.

Finally, deploy this project to your SOA server.

On deployment you can notice that the service is exposed both as a WSDL based webservice and HTTP based REST service. This will enable clients to interface through either standards.


You can test this service either via Enterprise Manager (EM) console - test mode or via normal browser.

For testing your SOA 11g based HTTP service refer to my blog entry here

Consuming a HTTP REST service in SOA 11g BPEL process:

Step 1: Create a SOA Project with empty composite and name it "InvokeHttpGetService"

Step 2: Drag and Drop a HTTP Binding adapter on to the "External References" swimlane in the SOA composite (SCA)

Step 3: Choose Next in the Welcome page of the wizard

Step 4: Enter service name
 Step 5: Choose "Define from operation and schema (specified later)" option
Step 6: Choose the following options and click Next

Type: Reference [Since we are consuming a HTTP REST service]
Operation Type: Request-Response [Default selection for references]
Operation Name: Request-Response [Default]
Verb: GET [This specifies the HTTP method. You have 2 options GET/POST]
Payload Type: url-encoded [Default]
Endpoint: Provide the HTTP URL for the REST service to be invoked. In this case, you can obtain the HTTP URL from enterprise manager console.

Step 7: In the Messages dialog, select the GreetCustomer.xsd, <CustomerInput> and <Response> XML elements for "Request Message Schema" & "Response Message Schema" respectively.


Step 8: In the summary screen, click Finish to complete the service adapter

Now, drag and drop a BPEL Process on to the Components section of your SOA composite. Provide a name to the process, accept other defaults and click OK

Wire the BPEL process with the HTTP Binding adapter in the SOA composite.

Inside the BPEL process, just map the input payload element to the <Name> element of the greeting rest service and deploy to SOA server.

You can now test and check both SOA services in action. One will expose itself as a REST service and the other will invoke it.

Source code can be downloaded here

Let me know your thoughts in comments section.

Friday, July 12, 2013

Solving BPM PS6 (11.1.1.7) Webform Rendering Issue

When the server host name is not properly set during SOA installation, BPM picks up the default server URL while rendering webforms. This could cause rendering issue since webform expects full server hostname (localhost or short server hostname will not render the webform content).

Check out here for further configuration required for BPM PS6 WebForms...

Often the easier fix would be to manually update the host name in the enterprise manager for each of the human tasks in the BPM process. But that could be time consuming especially if you have many human tasks in your process and redo this every time you redeploy the process.

To have a permanent fix in place so that all human task webforms in future use the fully qualified hostname, set the FusionAppsFrontEndHostUrl property in your soa-infra as shown below;

1. Login to EM console as administrator (eg. weblogic)

2. Expand SOA, Right-Click on soa-infra -> choose SOA Administration -> Workflow Properties

3. In the resulting "Workflow Notification Properties" screen click "More Workflow Notification Configuration Properties..."

4. Enter the required fully qualified URL in the "FusionAppsFrontEndHostUrl" property in the following format;
*=http://hostname:port
5. Click on "Apply" and save the settings.

Henceforth, all BPM deployments would make use of the FusionAppsFrontEndHostUrl to render the forms.

Saturday, November 3, 2012

SOA 11g MDS - Share Common Artifacts

As promised on my previous post, I am detailing the step-by-step instructions which allows for sharing of common artifacts (schema files/WSDLs) among SOA projects and more importantly helps in loose coupling of service bindings & remove service dependencies.

A typical use case is where the abstract WSDL definition of an external service can be stored in MDS and referenced from the SOA composite which will loosely couple the services and also guard against 'SOA Composite Invalidation' issues.

SOA 11g provides us with MDS repository (both file based & DB based) where common artifacts can be stored and referenced by all projects in the SOA infrastructure.

File based MDS is used during design/deploy time where as DB based MDS is used at run-time by the SOA infra. A configuration file named adf-config.xml that is part of every SOA project manages this partition mapping to be used by JDeveloper during design/deploy time.


All SOA projects that are deployed on the SOA infrastructure are stored in the MDS repository. If you create a connection from the JDeveloper 'Resource Palette' to the SOA MDS, there will be a 'deployed composites' folder which will contain all deployed artifacts.

Connection Information for the MDS connection:
username: XXX_MDS (usually DEV_MDS)
password: xxxxxxxxx
MDS Partition: soa-infra


The file based MDS repository is generally the 'seed' partition under a typical JDeveloper install;

<JDev_Home>\integration\seed


Under this partition there is a root folder (soa) available by default which contains all the configuration files, schemas & WSDLs required by various different SOA components during design time. These files are also pre-deployed on the database MDS repository.

We are now free to create custom folders under the 'seed' partition to hold artifacts that are common references in a SOA environment. Generally, we create an 'apps' folder under the 'seed' partition which in turn holds various folders to hold various artifact types;
 Once the artifacts that needs to be shared/referenced are placed under the appropriate namespace (in this case 'apps'), we can let the SOA project in JDeveloper to point to MDS for these artifacts from a common location.

adf-config.xml configuration:


As noted earlier, adf-config.xml is an important configuration file which holds the details regarding the MDS (both file based & DB based). By default, this file declares the 'seed' partition & the metadata store for 'soa' namespace.

This file can be found under <YourApplication>\.adf\META-INF.
Alternatively, in JDeveloper, expand the 'Application Resources' panel; drill through Descriptors -> ADF META-INF to find this file


Step 1: Just add the metadata store namespace for '/apps' in additions to default '/soa/shared' namespace - This is to let the JDeveloper reference the artifacts under the '/apps' during the design time from the file system metadata store.

<adf-mds-config xmlns="http://xmlns.oracle.com/adf/mds/config">
    <mds-config xmlns="http://xmlns.oracle.com/mds/config">
      <persistence-config>
        <metadata-namespaces>
          <namespace path="/soa/shared" metadata-store-usage="mstore-usage_1"/>
          <namespace path="/apps" metadata-store-usage="mstore-usage_1"/>
        </metadata-namespaces>
        <metadata-store-usages>
          <metadata-store-usage id="mstore-usage_1">
            <metadata-store class-name="oracle.mds.persistence.stores.file.FileMetadataStore">
              <property name="metadata-path"
                        value="${oracle.home}/integration"/>
              <property name="partition-name" value="seed"/>
            </metadata-store>
          </metadata-store-usage>
        </metadata-store-usages>
      </persistence-config>
    </mds-config>
  </adf-mds-config> 


Step 2: In the SOA composite, reference the common artifacts from MDS as shown below;

 <import namespace="http://xmlns.oracle.com/bpmn/bpmnProcess/CreditCardProcess"
          location="oramds:/apps/orderprocess/common/CreditServiceProcess.wsdl"
          importType="wsdl"/>


Now that we have successfully referenced the SOA project to refer the file based MDS it is barely enough only during design time. For deploy time & run time, these artifacts must be made available in the DB based MDS.

There are two methods available for us to deploy the artifacts in SOA DB based MDS;

Approach 1: Ant based script which allows to deploy the artifacts into SOA MDS. I am not going to get to the details of this as this has been blogged in detail by Edwin Biemond; Reference below;

http://biemond.blogspot.com/2009/11/soa-suite-11g-mds-deploy-and-removal.html

Approach 2: For a simple JDeveloper based SOA deployment follow the steps below;

Step 1: Create a new application (Generic Application)

Step 2: Name the application (eg., OrderProcessMDSApp) and click 'Next'
 Step 3: Provide a name to the project (eg., OrderProcessMDSProj) and click 'Finish'

 Step 4: Now, right click on the OrderProcessMDSProj and choose 'Project Properties'. In the 'Project Properties' dialog, choose 'Deployment' and create a new deployment profile by clicking on 'New...' button

 Step 5: In the 'Create Deployment Profile' dialog, leave the default 'Archive Type' to 'JAR File' and name the deployment profile (eg., soamdsarchive) and click 'OK'

 Step 6: This will open up the 'Edit JAR Deployment Profile Properties' dialog. Click on the 'Contributors' section under 'File Groups -> Project Output'.
Step 7: Click on the 'Add..' button and choose the folder where the 'content to be deployed' is present. Here the '/apps' namespace under the file based MDS can be chosen where the content is already placed & available.
Step 8: Now, click on the 'Filters' section and choose the artifacts under the '/apps' that you would like to deploy or upload to MDS database repository
Step 9: Click on OK to complete the deployment profile creation process. Now, we have created a project JAR deployment profile which contains the artifacts to be deployed on to the SOA MDS. Now, we will have to create a application deployment profile of 'soa bundle' type which will be deployed to the soa-infra.

Step 10: From the 'Application Menu', choose 'Deploy' -> 'New Deployment Profile..' option
Step 11: Under the 'New Gallery' go to 'Deployment Profiles' choose 'SOA Bundle' and click OK
Step 11: Under the 'Create Deployment Profile', provide a name to the application deployment profile (eg., soabundle1) and click OK.
Step 12: In the 'SOA Bundle Deployment Profile Properties' go to 'Dependencies' and choose the JAR archive that we created earlier eg., soamdsarchive and click OK
Finally, deploy the application to the soa server. This will ensure that the artifacts under the '/apps' metadata namespace is deployed on to the SOA MDS database repository.
You can verify the same from the SOA MDS connection created under the 'Resource Palette'. This should now reflect the 'apps' folder at the same level as 'soa' metadata store.

Now, if you try to deploy the SOA project which references MDS you may hit a deployment error complaining that the resource referenced is not found. This is because the JDeveloper consults adf-config.xml configuration file during design & deploy time (refer back to the initial architecture diagram). Since there is no information about the DB based MDS in the adf-config the deployer complains.

To fix this, go back to the adf-config.xml file and add the DB metadata store information so that the deployer can read & locate the referenced resources from MDS.


<adf-mds-config xmlns="http://xmlns.oracle.com/adf/mds/config">
    <mds-config xmlns="http://xmlns.oracle.com/mds/config">
      <persistence-config>
        <metadata-namespaces>
          <namespace path="/soa/shared" metadata-store-usage="mstore-usage_2"/>
          <namespace path="/apps" metadata-store-usage="mstore-usage_2"/>
        </metadata-namespaces>
        <metadata-store-usages>
          <metadata-store-usage id="mstore-usage_2">
            <metadata-store class-name="oracle.mds.persistence.stores.db.DBMetadataStore">
              <property value="DEV_MDS" name="jdbc-userid"/>
              <property value="xxxxxxx" name="jdbc-password"/>
              <property value="jdbc:oracle:thin:@hostname:1521:orcl"
                        name="jdbc-url"/>
              <property value="soa-infra" name="partition-name"/>
            </metadata-store>
          </metadata-store-usage>
        </metadata-store-usages>
      </persistence-config>
    </mds-config>
  </adf-mds-config>

That completes our configuration and eventually this elaborate post. Now, the deployment will be smooth as we have referenced the DB MDS in the adf-config.xml file.

Hope this post helped you understand & implement the SOA MDS related activities. Let me know your feedback through comments.